
Seeing is believing.
This saying explains why instructional videos made with screen recordings are so popular and effective. Students, employees, and online fans can learn a concept or series of steps very quickly in the same environment they're going to use themselves.
And for you, screen recordings allow you to create instructional content quickly and cheaply, using the most engaging kind of content there is - video!
Learn how to record a video by recording your screen for training in these simple steps.
If you need to train your team on Microsoft Word, for example, and you want to demonstrate the benefits of the Quick Access Toolbar, it helps to jump right into the app and point out how it all works. Written wikis and cheat sheets can list the basics, but a video will show them where to find features on the screen, walking them through a first-person experience that prepares them for their own efforts later.
Screen recording for training videos can be made with anything on a screen, of course:
- You can show a colleague How to Make a Pie Chart in Excel
- Demo important features like How to Freeze Parts of a Video in Camtasia
- Teach coding techniques like How to Add Registration Fields to a Form in Django
- And even complex game mechanics, like How to Create a Redstone Door in Minecraft.
Video provides key advantages over written instructions. By using on-screen notations, animations, and highlighting features, you can draw the eye toward important details while guiding the viewer through each step.
Ultimately, these videos work because they give your audience the confidence they need to try.
Have you ever read instructions that were too vague or unnecessarily complex, and started thinking, “How can I avoid this new feature or process?” Instead, show your team a step-by-step video and they are more likely to feel the confidence to repeat the steps themselves.
Are you ready? Here's how to make an instructional video with screen recording:
5 Steps when planning a screen recording for training videos
1. Define your learning objective
Start by answering this question: What should your audience know by the end? Or in educational terms: What is your learning objective?
Instructional videos work best when they focus on one key learning objective. This helps you avoid packing in too much content and overwhelming the viewer with new info.
The learning objective can also function as your title, like: “How to Create an Account”, or “How to Request Time Off”.
Your objective will define your video and guide your work.
2. Outline the necessary steps
Once you have a goal in mind, list each step.
Where should they start, what path should they follow, and where will they end up? And how will they know they’ve achieved their goal?
If you’re not sure where to begin, research similar videos online. What do they cover? It doesn’t hurt to review others’ work to validate your ideas or find new techniques or shortcuts to add to your own process.
Start your video in a familiar spot, like a home page, main menu, or blank document. This will help people to follow along right from the beginning.
Instructional videos benefit from a narrator or on-screen guide, who should prepare an outline, script, or combination of the two. Bulleted lists of points to cover can be nice for more experienced people because it serves as a structure to follow, while full scripts allow you to write out everything in advance to ensure you cover everything. However, reading from a script can sound unnatural and stiff.
What you prepare really depends on your level of experience, which is why sometimes it’s helpful to do a combination: write out key sections word-for-word, where you need to remember specific details or words, but then use an outline for the sections you’re more comfortable with.
3. Storyboard the important parts
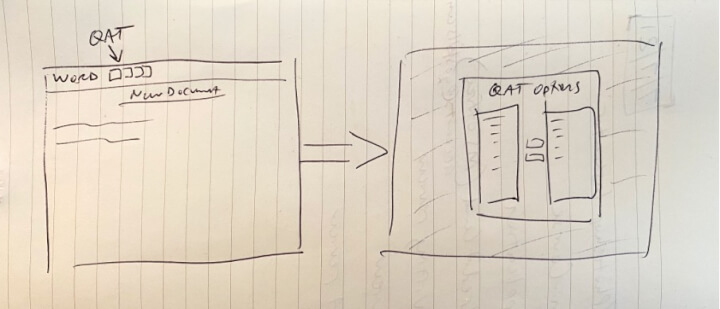
A great way to visually support your outline and/or script is to storyboard your video. Once you’ve listed each step to follow, what should your viewers see on screen? Prepare yourself for recording by creating a rough draft of what the video will look like. Sketch it on paper, take a screenshot, write out a description, or all of the above.
In the example below, I’ve sketched out how I want to take viewers from a New Document in Microsoft Word to the Quick Access Toolbar option window. By envisioning each key part of the video in advance, I know which shots to get when I start recording.
4. Show, don’t tell
As you go through each step and show your viewers where to go and what to do, it helps to use an example they can identify with. Writing out 10 generic steps certainly tells your readers the “what”, but good examples can answer the “when”, “where”, and “why”.
If you’re going to record yourself as you click through a platform or app, prepare your example before you begin. Don’t improvise your way through important steps, as this may result in occasional mistakes as well as awkward pauses as you try to figure out “what’s the best way to show this?”
5. Emphasize key details by adding effects
If you’re going to use video, take advantage of the video features and effects that can help you explain each step.
After you record yourself, you can call out important parts of the screen to further reinforce where things are. Zoom in on key details, or remind viewers about keyboard shortcuts and other important notes in an efficient, engaging way with on-screen notations and elements.
Screen recording tools
So, what tools can you use to make instructional videos with screen recordings of your own?
Three of the most popular screen recording apps on the market today are Camtasia, Screencast-O-Matic, and Screenflow. They’ve got similar features which allow you to record, edit, and produce videos, helping you stay aligned with social media trends that prioritize engaging and shareable video content.
In this article, I’m going to show you Camtasia. I’ve used it for years and here at GoSkills we recommend it to all of our instructors as it’s easy to learn. Through some screen recordings of my own, I’ll show you how easy it is to produce your own videos.
To follow along, download Camtasia from the official website. You can get the program for Mac or PC, and it comes with a 30-day Free Trial.
After you install, start up Camtasia and you should see a screen like this one:
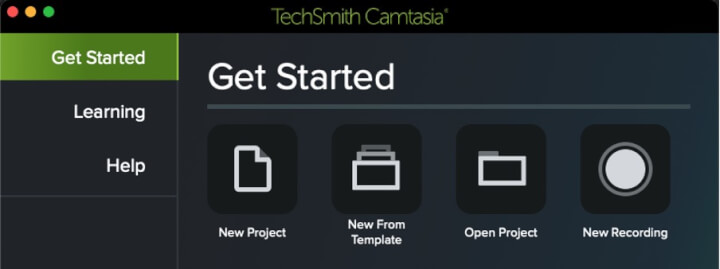 Before we record anything, let’s click on New Project so I can give you a quick tour.
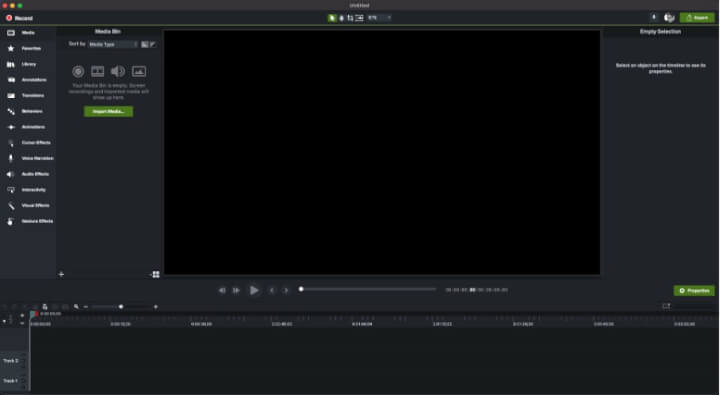
When you open your first new project in Camtasia, this is what it will look like. (This screenshot shows the Mac version, but the Windows version looks pretty similar.)
Each section of the interface plays an important role in video editing:
- Canvas: The big black rectangle in the middle is where you’ll see your video project while you edit it.
- Effects: On the left, you’ve got a variety of effects you can choose from, including video transitions, audio properties, animations, and more.
- Timeline: Across the bottom is the timeline editor. This is where you’ll make the edits to your video and audio tracks, and where you’ll apply any effects, add on-screen text elements, and adjust the volume of individual clips - just to name a few.
- Properties: Over on the right is a Properties pane which will show more information about whatever you’ve got selected, and where you can adjust settings on effects and on-screen elements.
Creating your instructional video with screen recording
Prepare for recording
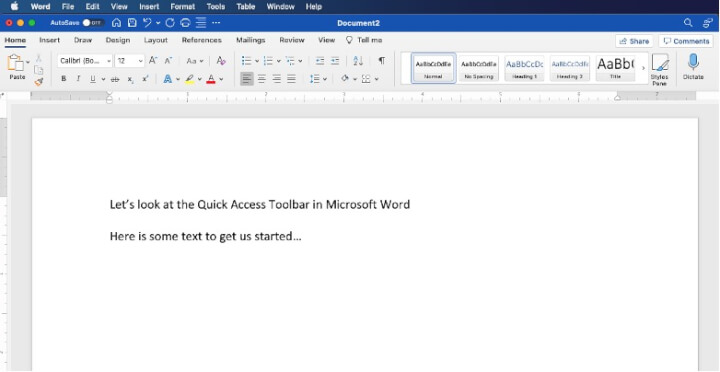
Before you begin recording, as I mentioned earlier, let’s prepare the steps we want to follow. For this example, I want to show how to personalize the Quick Access Toolbar in Microsoft Word. So before I start recording, I’ll open up Word and a new Blank Document.
During my video, this is the outline I’ll follow:
Note that this is an outline/script hybrid. I wanted to remember to open with a specific intro - “Welcome to this Quick Tip…”, etc. - before relying on the outline that follows.
In a nearby notebook, I have the rough storyboard that I sketched to remind myself visually of what I want to show. Storyboarding isn’t a requirement, of course, but it can save you time while recording so you know how to show specific details.
So, once I’ve opened up Word and a blank document, I’m ready to record.
Setup your recording options
In Camtasia, go to the File menu and choose “New Recording…” You will then choose the recording inputs: which things do you want to record?
- Your screen? Obviously, a screen recording requires that you record your screen, but if you have multiple monitors, choose the one you want.
- How much of the screen? You can record the entire screen, or part of it. You can choose a standard video size like 1080p or 720p. If you’re not sure, capture the entire screen and you can crop it later.
- A microphone? If you intend on narrating while you record, you will choose your built-in or external microphone. I highly recommend an external microphone if possible for better quality. I would say it is a necessity for any instructional video.
- System audio? Do you need to record any sounds or audio the computer might make while you walk through your steps? If you’re not sure, click it and capture it anyway. It can always be removed if you don’t need it after the recording is done.
Once you’ve chosen the inputs you need, you should see a window that looks like this:
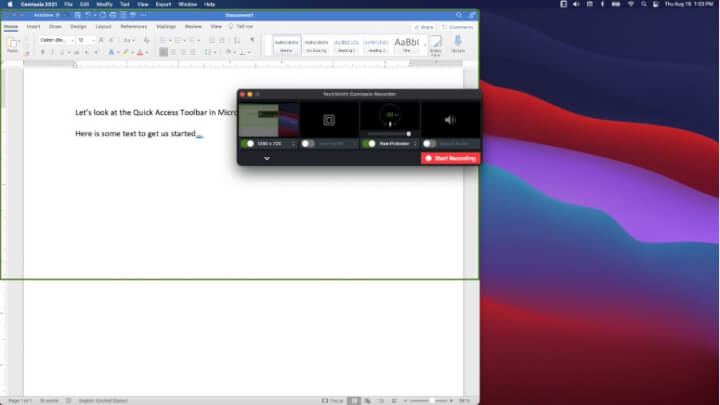
The green box shows what will be recorded, and you can also see I’ve selected a Rode Podcaster microphone as my audio input.
When you hit Start Recording, a short countdown will appear, and then you can begin.
Tips for recording
While recording, keep this in mind:
You can edit, so record multiple takes whenever you want. It’s understandable to get nervous, but remember: you can (and will) edit this recording. If you mess up, simply start over. If you feel like you didn’t quite get that one part right? Do it again! It’s very easy to cut things out and keep the best parts. So try to relax and remember to breathe.
Also, give yourself room to edit by taking long pauses. It’s so easy to remove short pauses, so don’t force yourself to get everything right in one take. Pause in between sections or even sentences, collect your thoughts, and continue when ready.
When you’re done recording, click on the Camtasia logo at the top and choose Stop Recording. This will return you to Camtasia where you can now edit your work.
Feel free to repeat this process and do multiple recordings if you like. The important thing is to cover the necessary information and to do so in a clear, easy to understand way. If you need 5 or 10 times recording to get it right, that’s perfectly acceptable. All that matters is the final project anyway.
Edit your video
Once you’ve recorded your video, you should see a Camtasia project that looks like this:
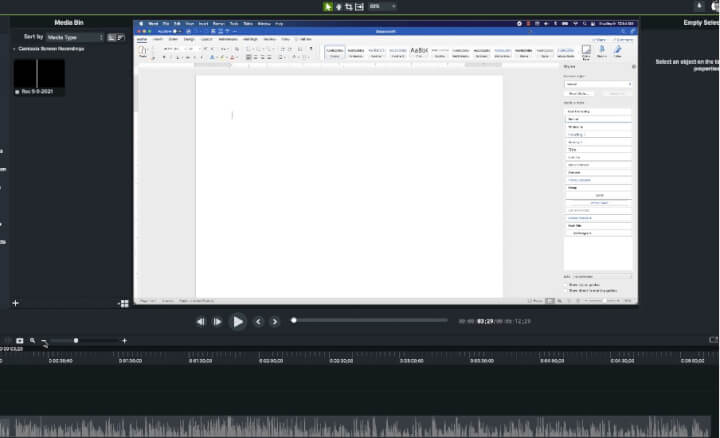 With your recording now on the timeline, the easiest way to edit is to start at the beginning and work your way through to the end.
Drag the playhead - the gray marker with the red and green sides to it - all the way to the left. This is the beginning of your recording. Then hit the play button. (You can also hit the spacebar to start and stop the playback.)
As it plays, you might see some areas you can cut, especially at the beginning before you start speaking. A helpful feature in Camtasia for quickly removing sections of a recording you don’t need is the Ripple Delete. Select the portions of the recording you don’t want using the red and green draggable markers next to the playhead. While it’s selected, click play to confirm this is what you want to get rid of.
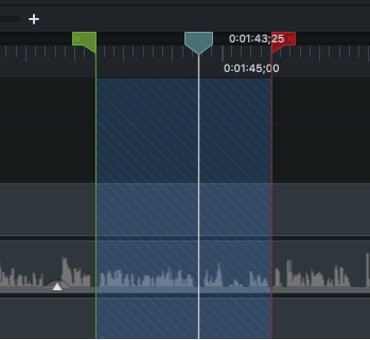 When you’re ready, go to Edit > Ripple Delete. You’ll see the pieces you don’t want are deleted, and the rest of the project moves up so there’s no empty space. Ripple Delete is a quick way to make edits and progress through your project.
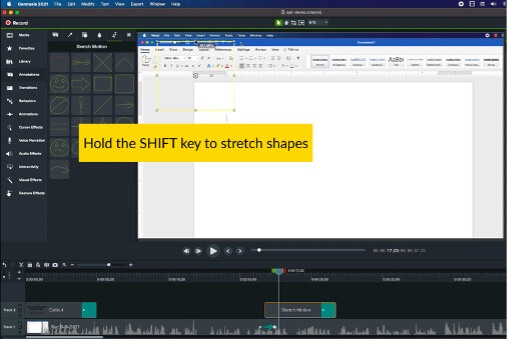
If you’ve never edited before, I’d recommend removing all the mistakes and bad takes first before adding any extra special effects. When you are ready, though, you might consider adding a few of these to your video to highlight key pieces. For example, you could zoom in and highlight fine details:
 Or, you could add overlays and other elements, like this:
 The level of editing and complexity is up to you!
An important tip: audio quality makes a big difference, so edit while using headphones. This is the best way to ensure your project sounds as clear as possible. Many editing programs now offer a noise reduction filter to remove any background noise you might have picked up during recording.
The last step of editing is always the same: watch the video again. Ensure you’ve reviewed the entire project by watching it through from beginning to end. Consider what a viewer might pay attention to, and ultimately, consider: does the video actually answer the question you set out to answer? Does it satisfy your learning objective?
Publish your video
When you’re done editing, you can export your video and then upload to your content management system, or even put it on a platform like YouTube. Videos in .mp4 file format are the most common and compatible.
If you want to offer the best of both worlds, you can embed your video in a blog post - like we did here. You could also include the video on a resource page where you write up the step-by-step instructions and give your reader the option of reading through everything, watching the video, or a little of both.
Ultimately, the success of your instructional video relies on your preparation, and understanding what your audience needs. Give them the confidence to try things on their own by producing a video that shows them exactly what they need.
Looking to seamlessly deliver engaging courses and training, while tracking your team’s performance with insightful reporting? GoSkills provides a free, cloud-based LMS for teams of any size. Find out more.