
I can’t tell you how much time I’ve spent (ahem, wasted) doing the very same thing over and over and over again in Excel. Formatting my workbook, plugging in formulas, formatting cells, and highlighting rows. The list goes on and on.
But, what if I told you that there was a way you could easily automate basic Excel tasks? What if—with just the click of a button—you could easily complete those routine tasks? Well, this is another area where Excel really shines. It’s time to meet your new best friend: macros.
Let’s jump in to our Excel macro tutorial for beginners.
Step up your Excel game
Download our print-ready shortcut cheatsheet for Excel.
What is a macro?
A macro is a piece of code within Excel that you can use to automate many routine tasks—just like the ones I mentioned above.
You may have heard the terms "macro" and "VBA" used interchangeably, but there is a distinction. Put simply, VBA is the programming language used to write macros.
Check out this explanatory video for more background on the differences between macros and VBA from the GoSkills Excel Macros & VBA course.
When you have some experience under your belt, you can use VBA to create more complex macros as shown in this tutorial on advanced filtering.
Before you get intimidated and write macros off as yet another Excel feature that’s far too complex and advanced for you, take a breath.
The concept of a macro might seem complicated. But, learning to use them to your advantage is actually surprisingly simple.
Where to access macros
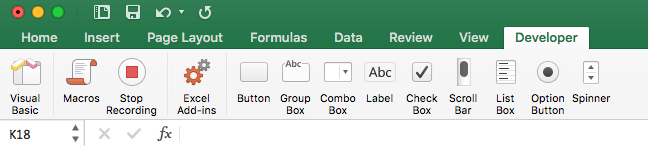
To get started, the first step in your macro Excel journey is to ensure that you have access to the various buttons and functions you’ll need to build your macro.
Those are all found within Excel’s “Developer” tab. However, by default, Excel hides that tab. If you aren’t currently seeing it, you’ll need to take a few steps to have that tab as part of your toolbar. How you’ll do that will depend on whether you’re using a PC or a Mac.
If you’re using a PC, visit “File” and then select “Options.” Click “Customize Ribbon” within the menu, and then check the box for the “Developer” tab. Hit “OK” and the “Developer” tab will appear in your ribbon.
If you’re using a Mac, click “Excel” in the upper left corner of your screen (next to the Apple logo) and then “Preferences.” From there, hit “View” and then check the box for the “Developer” tab.
How to build a macro: A case study
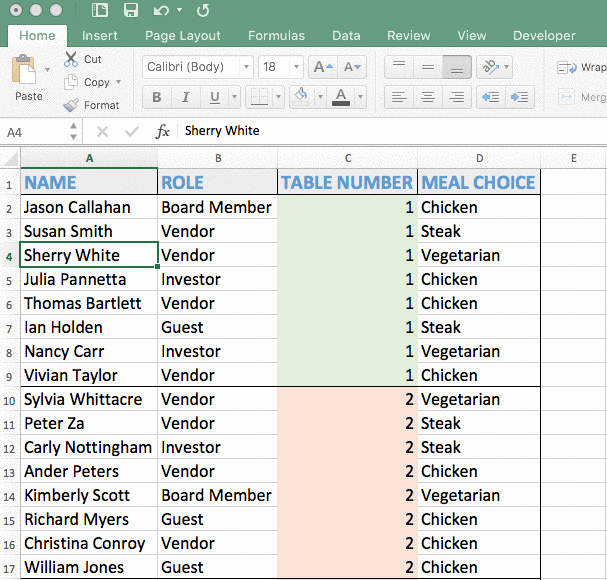
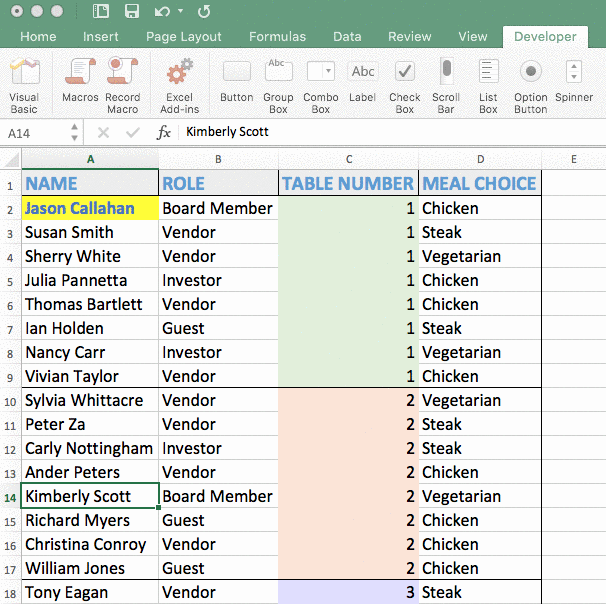
Meet Sophia. Sophia works as an event coordinator at a large tech company, and she’s currently working on putting together an annual luncheon for the company’s vendors, investors, board members, and other stakeholders.
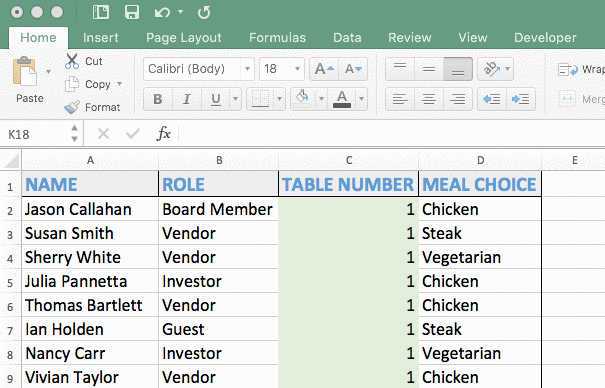
Sophia used Excel to organize and track her entire invite list—and, right now, she has about 400 different rows of data that list the attendee’s name, role, table number, and his or her dining choice.
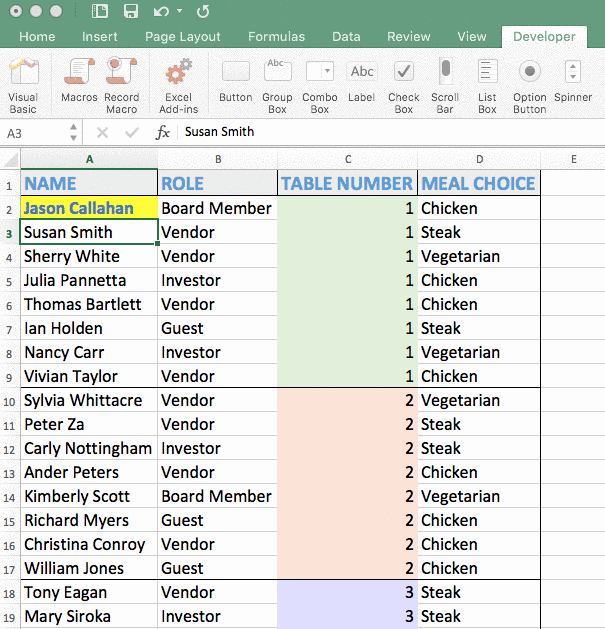
In order to recognize the company’s board members, Sophia has requested that the caterer (who will use Sophia’s Excel spreadsheet when setting up the event) puts something special at the place setting of each and every board member.
To distinguish who on that massive Excel spreadsheet is a board member (without screwing up her order and table numbers!), Sophia and the caterer agreed that she should do the following to obviously note who at each table is a board member (so it isn’t missed by the setup crew):
- Bold the board member’s name
- Change the text of the board member’s name to blue
- Highlight the cell containing the board member’s name in yellow
Sophia’s happy to do so. But, she’s realizing that it’s taking her forever to find the board member at each table and then go through those three different formatting steps for each and every board member cell.
With a little Excel knowledge under her belt, she decides to build a simple macro—so, when she finds a cell for a board member, she can apply those three formatting rules with just a single click of a button.
Let’s build this macro right along with Sophia.
1. Setup your macro
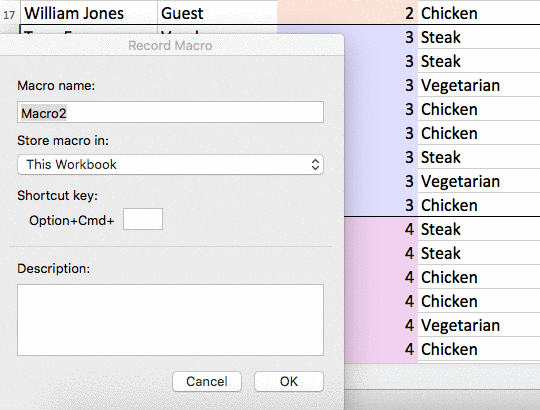
To start, click in a cell that does not belong to a board member, go to the “Developer” tab, and then click “Record Macro.”
At that point, you’ll see a window that gives you the option to name your macro (important note: Excel will not allow you to include any spaces in your macro name). Click to store the macro in that workbook (since that’s where Sophia is working with the data).
You can also enter a keyboard shortcut to apply that macro (in Sophia’s case she’ll use option+command+b for board member) and a description (which is helpful if you record and store a lot of macros).
When you’re done entering the necessary information, hit “OK.” At that point, you’ll see “Stop Recording” in the “Developer” tab. This means that you’re actively recording your next steps.
2. Record your macro
Recording a macro is exactly what it sounds like—Sophia will use Excel to record the steps she’s taking to format one cell. When those steps are recorded and the macro is built, she’ll then be able to format a board member cell totally painlessly.
Now that we’ve set up our macro and are actively recording, Sophia will select the name of a board member and then apply her three formatting rules: bolding the text, changing the font color, and highlighting the cell.
When she’s done, she’ll hit her “Enter” key and then head back to the “Developer” tab to hit “Stop Recording.”
3. Edit your macro
Here’s an important thing you need to remember: Going through those steps means that Sophia has just recorded her macro. However, Excel thinks it only needs to apply those rules to that one cell.
In order to use that macro other places, she’ll need to adjust the range of the macro. Fortunately, that’s easily done.
To do so, click “Macros” within the “Developer” tab. Within that macros menu, select “Step” (which will be referred to as “Step Into” on PCs).
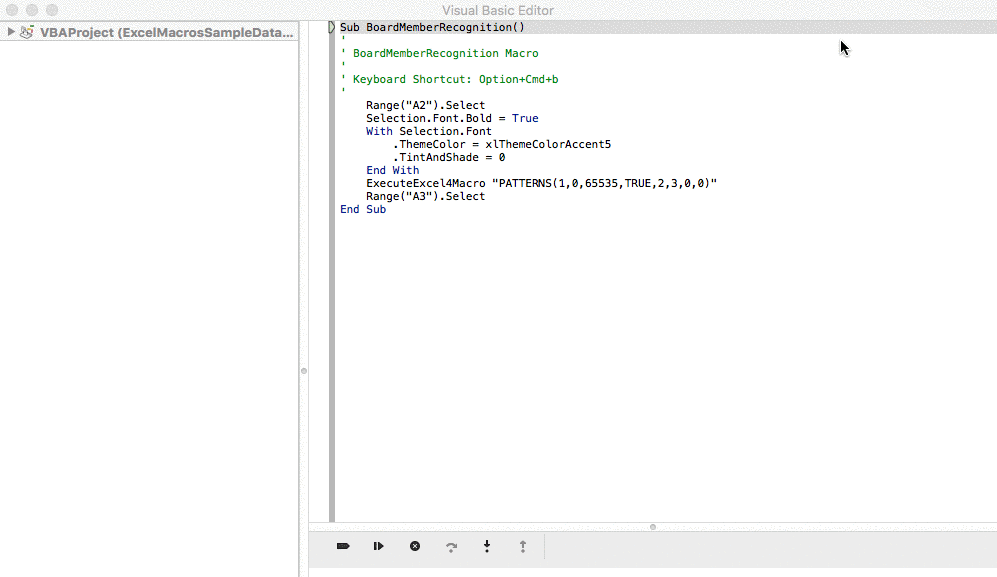
After doing so, you’ll be met with a rather intimidating window, which displays the VBA (that stands for Visual Basic for Applications and is Excel’s programming language) you just recorded.
Within that window, you’ll see two different lines that begin with the word “Range.” Those lines are telling Excel that you only want those formatting rules applied to cells within that range—which isn’t what Sophia wants, since she’s planning to use this macro for other cells.
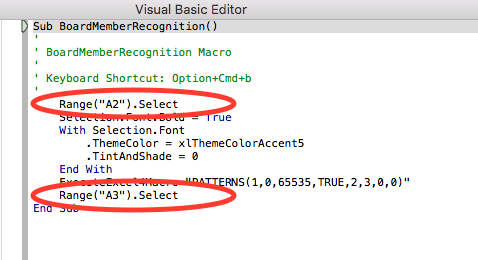
So, it’s as simple as just deleting those two lines from that code and then closing out of that window.
4. Use your macro
With that range deleted, Sophia is now able to apply that macro to other cells.
In order to do so, she will just select the next name of a board member and use the keyboard shortcut she created (remember, that was option+command+b) to easily apply all three of those formatting rules to those cells.
What if she didn’t create a keyboard shortcut? She could also click the desired cell, select “Macros” on the “Developer” tab, and then hit run.
She (and you!) did it—we created a simple macro that Sophia can use to quickly format her board member cells.
However, there’s one more important thing to note: When saving the workbook, Sophia would need to make sure to save it as a .xlsm file.
Put simply, you need to tell Excel that you want your workbook to host a macro, and using that file format ensures that your workbook is macro-enabled.
Challenge me! 🤺
 |
Test your newly-acquired macro skills by taking this FREE Excel challenge! |
Ready to become a macro master?
There you have it—a basic macro to remove some of the drudgery of the repetitive task of formatting cells.
There’s so much more that Excel macros are capable of, and we’ve barely scratched the surface here. For example, we could’ve added an automation to the above macro to find all board members and apply those formatting rules—removing even more of the manual effort required.
Does that pique your interest? You’re in luck. Our beginner’s course on Excel macros will walk you through everything else you need to know to become a macro master and truly use that handy feature to your advantage.