
Brochures are a powerful tool for spreading awareness of your business or event, and educating potential customers about your product. Though relatively small, their format naturally allows for conveying multiple points of information for many occasions, whether advertising your business services or promoting a charity event or school play.
The key to an effective brochure is to capture and maintain the reader’s attention with a compelling design. This post will guide you through the key elements of brochure design, and how to make a brochure in Microsoft Word, step by step.
Learn more about Word
Download our print-ready shortcut cheatsheet for Word.
The five C's of brochure design
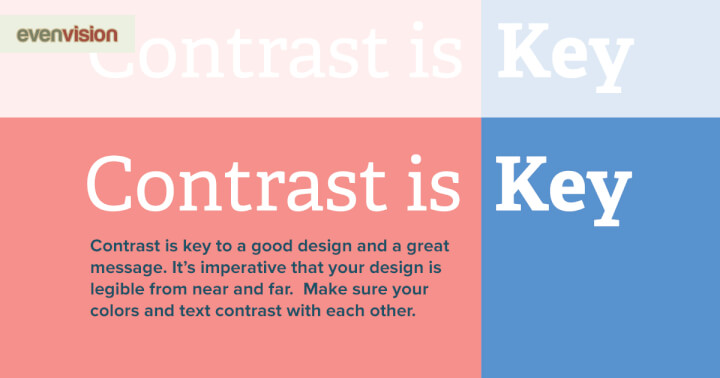
1. Contrast
Use contrast, such as combining light and dark colors, to call attention to the most important elements of the brochure. Changing the font is another way to add contrast. As a general rule, avoid using more than two typefaces. Instead, change the font in other ways, such as making it bold, larger or adding italics.
2. Clutter
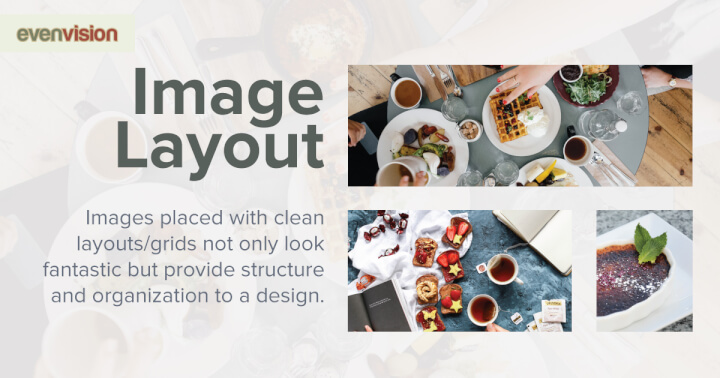
Avoid clutter in your design. Every image, button, logo or group of text should have space around it. It will be easier to create this white space if you limit the number of elements you are attempting to include. Select one or two high quality images, rather than including all of the imagery you have. Stick to the most important talking points and leave out the rest.
Or you can simply turn a video into a gif so as to create motion in your design.
3. Copy
Keep your copy short and concise. Try to keep headers and subheads to brief phrases. Summarize longer pieces of text and make it scannable by incorporating bullet points, numbering or bolding main points.
Use a simple font that is easy to read. When adding copy to your design, pay attention to any widows or orphans. These occur when a single word or sentence falls on a separate column or page then the rest of the text.
4. Content placement
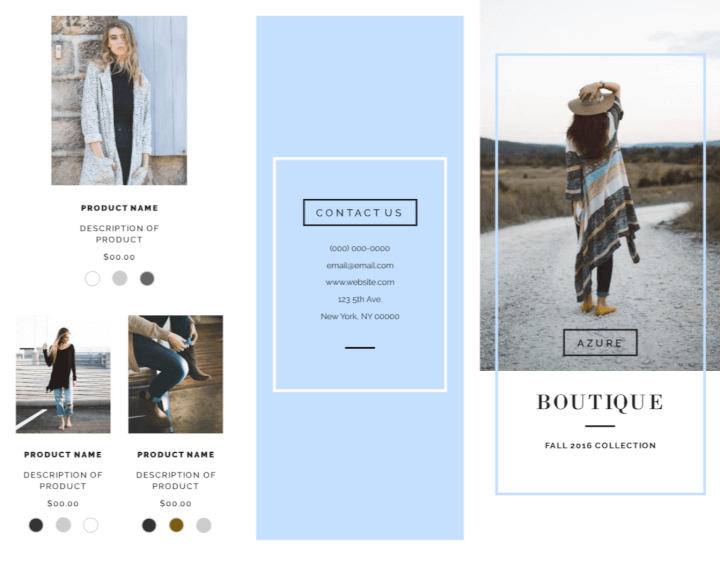
Create alignment by placing images and text in-line with each other. For example, you may choose to right align the front cover of the brochure and left-align the inside. Center alignment can work well for small sections, such as contact info, but should be used sparingly.
Additionally, consider the hierarchy of the page. Make sure the most important elements are placed in a prominent position without any distracting elements near it.
5. Color
There’s a lot to consider when selecting an appropriate color for your brochure. Start by thinking about the messaging you want to convey:
- More conservative businesses tend to opt for blues and greens.
- Red can indicate energy or danger.
- Yellow can be used to communicate cheerfulness, but can also easily be too bright, so use it with care.
- Purple is a color of royalty and is frequently used to communicate luxury.
For the most part, you will want to select two contrasting colors for your color theme, such as blue and orange or purple and yellow.
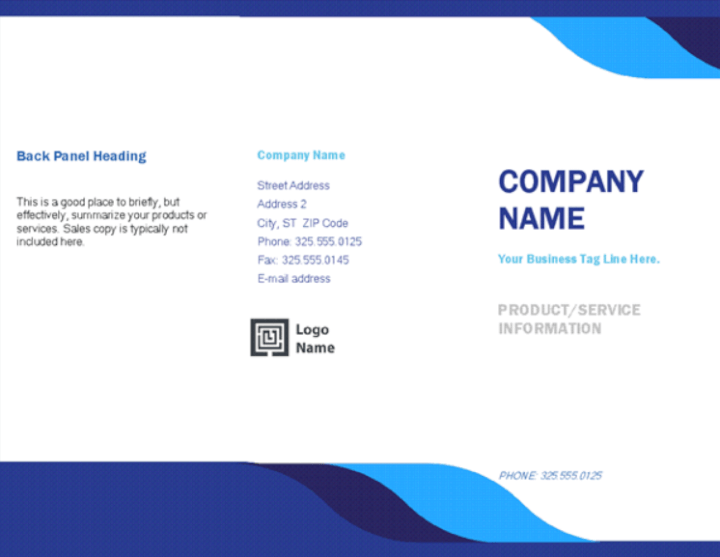
How to make a brochure in Microsoft Word
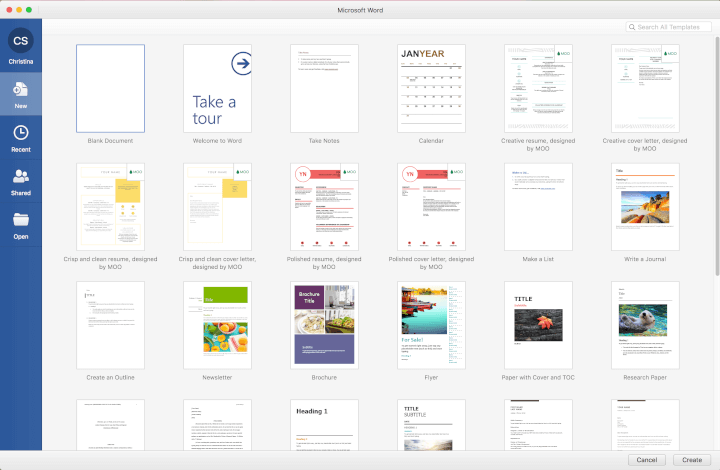
Create a new document
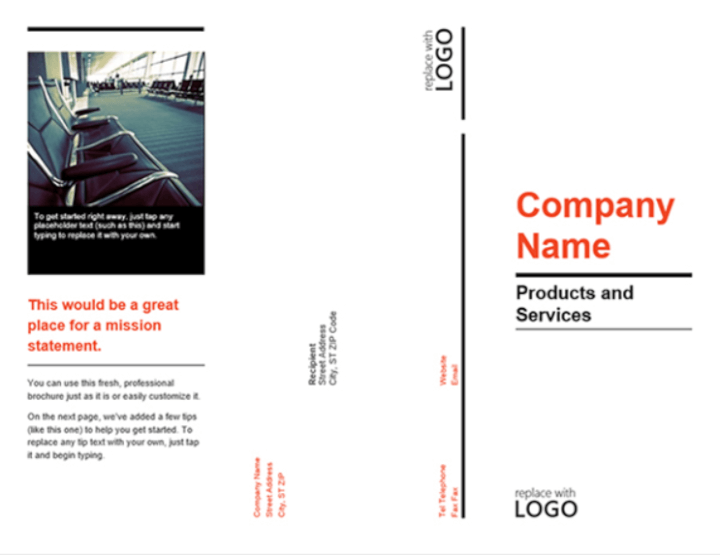
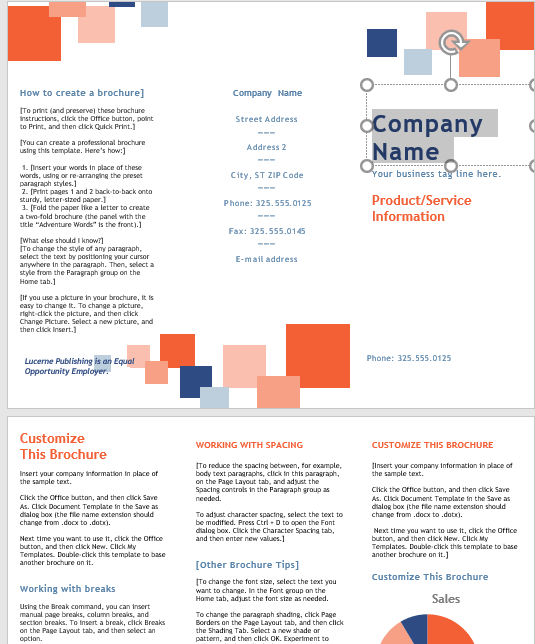
This can either be a blank document or start with one of the brochure templates. Microsoft Word offers single-page, bi-fold, and tri-fold brochure templates.
Adjust the layout
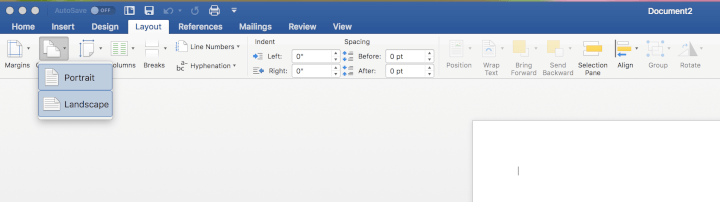
Orientation
If you’re starting with a blank page, create a tri-fold brochure layout by going to the Layout tab on the ribbon. Click on Orientation, and change the orientation from portrait to landscape.
Margins
Then, click on Margins and adjust the margins to .5” or smaller. Remember, the margins will create a white space around the border of the brochure, so if you are using a colored background you will want to make the margins smaller by selecting Margins --> Custom Margins. I’d suggest .25” right and left, and .31” top and bottom.
You can skip this step if using a template, unless you want to adjust the preset margins.

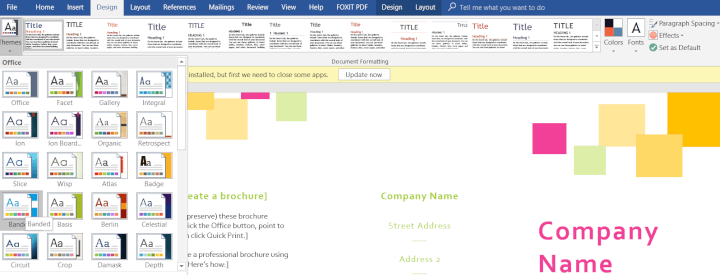
Choose a theme
Next, under the Design tab, go to Themes and select the desired theme for your brochure. This theme will then populate the Home tab with selected fonts and colors for Headings, Titles, Subtitles and Normal Text.
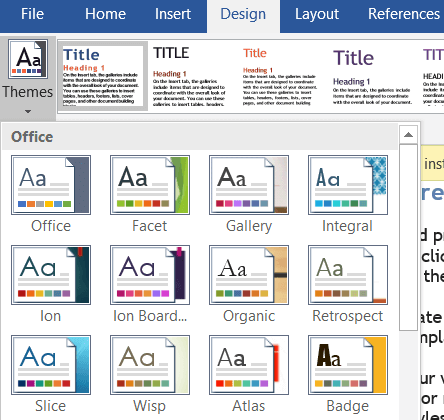
A template will come with a pre-selected theme. You can change the theme under the Design tab as shown above, or open up the style pane to make small adjustments, such as changing the default Header color.
Create the basic structure
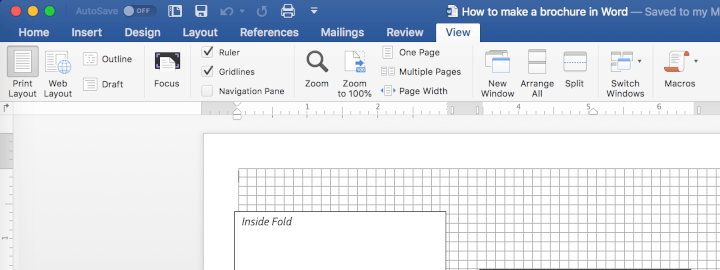
Ruler and gridlines
Under the View tab, select the checkbox to add the ruler and gridlines. Use the gridlines and ruler to create accurate spacing.
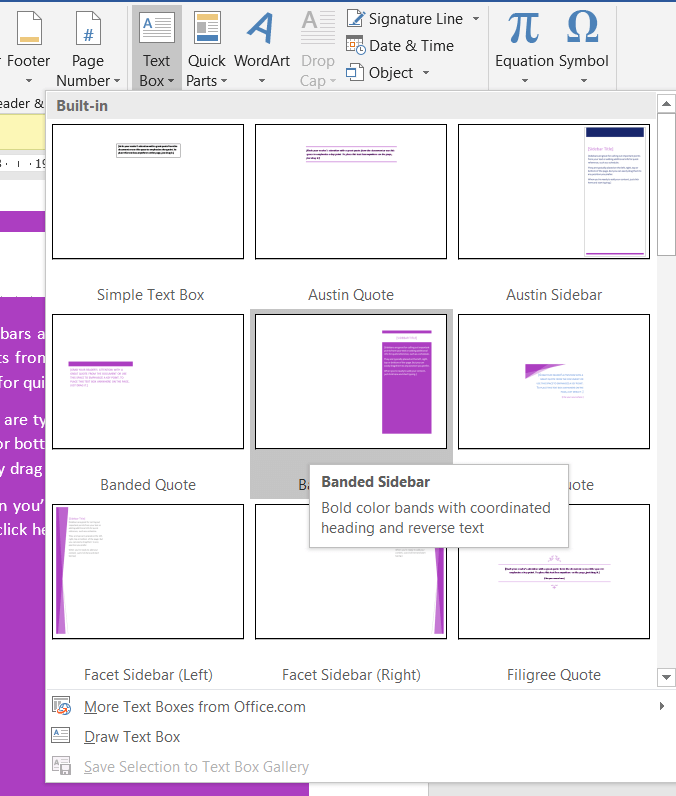
Text boxes
If using .5” margins, create text boxes that are 3” wide. These can be made shorter or longer depending on the copy you want to include. For example, use a short box to create a title and a long box to add several paragraphs of text.
To insert text boxes, go to the Insert tab --> Text Box. In addition to a blank text box, you will see a number of options based on the theme you have chosen.
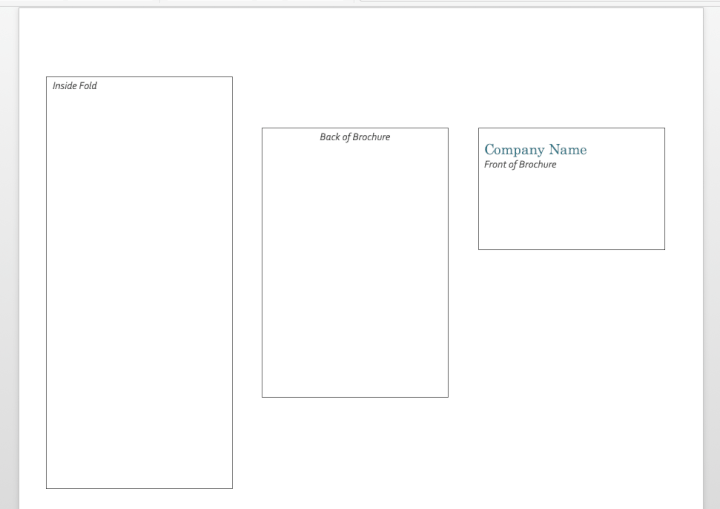
Columns
You will need two pages with three columns. The first page will be the front, back, and inner fold of the brochure. The second page will be the inside of the brochure. Use the ruler and gridlines to space the text boxes into three even columns per page.
If using a template, this is already done for you, so you can skip this step.
Add your content
Now that you have six columns, start adding your content to your brochure. In addition to copy, use the Insert menu to add images, shapes, and charts. Remember that images can bleed from one column to the next.
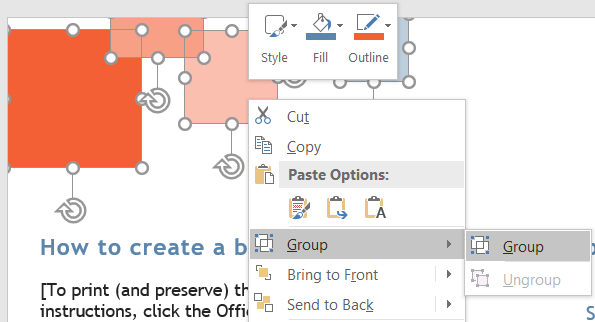
Create content groups
Your content will naturally fall into content groups, such as a header and subhead, or a group of shapes that form a design. Select each of these individual objects and convert them into a group. This will allow you to move each of those components together as you tweak the design.
Enjoy your finished design
You now know how to design a brochure in Microsoft Word! Whether you choose to start from scratch with a blank document, or use a template, you’re only limited by your imagination.
We hope this tutorial and the 5 C’s of effective brochure design will help you create stunning, compelling designs in Microsoft Word to showcase your product, business, or event.
Alternatives to creating brochures in Word
In addition to Word, there are other tools you can use to create brochures, flyers and pamphlets.
LucidPress is a popular web tool allowing you to create brochures right in your browser by choosing from a variety of templates, importing content from Google Docs or DropBox, and even collaborating online with a colleague or client.
Design software like Adobe’s InDesign and Illustrator as well as Microsoft Publisher are also viable options to help you get a professional result.
Want more tips and tricks?
If you're looking to become a Microsoft Word whiz, check out our Basic and Advanced course for more practical tips on formatting and editing professional documents. You might also like our roundup of free Word resume templates if you'd like the hard work done for you!
For more design tips, the Illustrator - Basic and Microsoft Publisher courses can help you learn the essentials for unleashing your creativity when creating artwork, logos, flyers and more.